Wednesday, May 9, 2012

Vintage Wheels BOM

As promised I have designed a border for the 'Pretty Roses' version of my Vintage Wheels Block of the month. It is a simple paper-pieced star placed on the joins of the blocks.
When all 12 blocks are finished I think I will finish with a pink tone-on-tone border 5" wide.
Block 10 and 11 are ready to be picked up.
There is one complete set each of the Japanese and Pretty Roses left if anyone is interested in purchasing all 12 blocks in one hit contact me.

Saturday, May 5, 2012

HAG's

I have decided to start attending a group called HAG's at a quilt shop in a nearby town. 'HAG' stands for 'Hand Applique Girls' and I am looking forward to spending a day a month working on my latest quilt in the company of other women who also enjoy hand- stitiching. Since leaving all my quilting friends behind I am really missing the companionship of like minded women who can inspire and encourage each other.
My applique is progressing slowly. The next
couple of branches supplied plenty of practice
for making circles. I use the Karen Kay
Buckley Circles bought from Wendy at
Legend and Lace. They are made from Mylar
 which is firm but  nice and thin and can be
ironed over without ruining the circle.


Monday, April 23, 2012

Dear Jane Rulers


 Years ago I decided to sew a ‘Dear Jane’ quilt and eagerly bought the two rulers designed to help centre and trim the two predominate blocks. One is an elongated isosceles triangle and the other is a five inch square ruler.
As the years passed by it became obvious that this quilt was going to be a very long term project. The rulers sitting on my desktop are a constant reminder of the blocks tucked away in a box with other WIP’s.
As I hate things to go to waste,  I decided to make two quick and easy quilts using the two rulers.
The instructions for the first of the quilts is described here for the lovely Jan because she always admired my quilt and is waiting patiently for the instructions so she can make one.

The 5” square ruler quilt 
 
In an old patchwork book I came across
a picture of an old lady with  a quilt on her lap. It was a top her grandmother had made and not finished.
This is such a simple design but is so effective, as simple designs can often be!

 All the fabric you need for this is scraps, but if you like to make ‘matching scrappy’ quilts like me you will probably end up going out and buying some more fat quarters.
Cut a 5 ½ inch square for the background square
 Press the square in halves twice and then unfold.
 Cut a smaller centre square 2 ½” square (in a contrasting colour)
You will also need a 1 ¾” square cut from freezer paper.

Centre the 1 ¾” square of freezer paper shiny side up, on the back of the 2 ½” square of fabric.
Press the sides of the fabric over onto the shiny surface and they will temporarily adhere to it.
Turn the square over so that it is right side up and centre it onto the background fabric square making sure that the points line up on the pressed lines you made earlier.
Fold lines horizontally and vertically through the square
  Pin and applique into place.  You can either remove the freezer paper before sewing down the fourth side or wait until the square is completely sewn on and cut away the fabric from behind (a ¼” in from the stitching) and remove it then.
Now we get to use our ruler. (This is why we cut the background square bigger than we needed). No matter how well we create press lines and line up the centre squares we will always move things out of wack a little.  Line up the two lines going vertically and horizontally through the ruler so that the four points of the smaller centre square fall on one of these lines. Now trim the block. The block of course is now 5” square and will be 4 ½” when sewn together.
Sew as many blocks as you want to make a quilt the size you want.
I used 169 squares, 13 squares by 13 rows.
My final border is sewn from strips cut 5" wide for a 4 ½” finished border.
As a finishing touch I hand stitched a pretty lace around the edge of the blocks.
Finished quilt is 172 cm X 172 cm.


Friday, April 20, 2012

Basting a quilt

 I received my Quilters Dream 100% cotton Battings in the mail last week and set to basting my quilt top ready for hand quilting.
 The quilt backing fabric is placed  face down onto the trestle. One corner and the two adjacent edges of the backing fabric are lined up with one corner of the trestle. I allow an inch of fabric along the two lined up edges to fold over sides of the trestle. The fabric should be stretched out flat but with not too much pull, just enough to flatten out creases. Apply bulldog clips at regular intervals around the trestle, masking tape down the edge that is exposed on the table top.
Backing fabric taped down at top of the picture where the fabric isn't as wide as the trestle.
The same corner and edges are lined up when placing the batting down next. Smooth it out flat with your hands so there are no wrinkles. Again allow an inch of batting of the lined up edges to fold over the side of the trestle. Reapply the bulldog clips to include the batting.

Batting is now on- the bottom and right edges are the two that are lined up with only and inch over the trestle edges.
Lastly place the top, with the same corner and edge as the backing and batting lined up. This time line the top up with the edge of the table ie: no fabric folded over the sides. Stretch out flat and reapply the bulldog clips.
First half of the quilt can be basted- note where the edge of the top is on the bottom and right edges
Sorry the thread doesnt show up too well
 Using a long needle, (mine is about three inches long, thin and strong), sew long running stitches in both directions across the quilt, making sure you sew through the three layers. The lines I sew are about 4" apart. Where the quilt is longer than the trestle, leave thread long enough to pick up and finish when the second half of the top is stretched for basting. Backstitch at the end of rows twice instead of knotting.
When the first half is basted remove the bulldog clips and slide the whole quilt over the edge of the table until you reach the unbasted area. Line up the edge of the trestle with the quilt where the basting ends.  Bulldog clip this edge, then complete the stretching process again one layer at a time.
When the basting is complete I cut the excess batting and backing fabric about an inch away from the two overlapping edges. I am now ready to quilt.

 The basting process takes a while and can be taxing on your back so I take my time doing this. Walk away and have frequent breaks. It is a good time to contemplate where you will quilt the quilt while you are spending so much time looking at the top. When done I usually have my quilting designs all planned!

Thursday, April 5, 2012

Lots of birds!


There are quite a few birds in this new quilt which I love. I stitched the two who stand at the bottom of the vase and added the leaves and flowers to the lowest two branches this week.
Unfortunately I have not had a lot of time for stitching, having started work in the Emergency Department of a large private hospital up here.
I might get a bit of sewing done over Easter if I am lucky.


Blessing to all who find this a special time!

Sunday, April 1, 2012

Jelly Roll Dreams

A box of 'Jelly Roll Dreams' books, the latest book compiled by Pam and Nicky Lintott just arrived on my doorstep.


I was so excited looking through the book and finding my pattern. My quilt photographed well. Pam and Nicky make each persons design up with some of their own fabrics and have done a lovely version of my 'Penny Quilt' in pastels with a lot of grey (which I love).
There are so many lovely quilts in this new book I have already picked one I want to make! Contact me if you wish to purchase a copy of the book @ $29 + postage.
Below is the 'Penny Quilt',  my design that you will find in the book.


Wednesday, March 28, 2012

Appliqued flowers


I have finished the two large flowers that line up down the middle of the vase of flowers.
Now to work on some leaves.........

Monday, March 26, 2012

Starting a new quilt

I love starting a new quilt. Selecting the pattern and the fabrics is one of my favorite parts of the quilt making process. This quilt has been on my mind for a while and now is a good time to start it. With no teaching commitments or Trunk Shows to do with Wendy since moving up here I have found myself with some free time, most unusual! The quilt I am making is a reproduction of an appliqued medallion quilt by Ann Dagge  made in1818. The quilt now resides in the Smithsonian American Art Museum. The pattern I am using is an interpretation by Di Ford.

Di Fords quilt on the right
I spent a while deciding on my colour scheme and finally settled on a cream tone-on-tone background and lots of dusky through to double pinks, with greens and some touches of black.


The design for the centre applique is drawn onto the background and the stems are the first thing I tackle.


Today I appliqued the vase, fussy cutting some leaves and a flower in the centre. Trying to turn my points under was frustrating me until I remember the useful tool Wendy would hand everyone in her needleturn classes.... a Toothpick! The slightly rough wooden edge was more successful in pushing the fabric into place where the needle had been slipping. Thanks Wendy!


Monday, March 19, 2012

Displaying Quilts

 I have so many finished quilts. I might give some of them away one day but a lot are still needed as samples for when I teach. I hate sticking them away in a cupboard but love to have them on show. After showing you the quilt I hung in my hallway I thought I would show some of the other quilts that are displayed around our new home. 


Friday, March 9, 2012

Hanging a quilt!

I hate having to add a hanging sleeve to a quilt, especially long after it's been bound. Adding the sleeve during the binding process has so many advantages. Well I have had to add a sleeve to my 'Reminisce' quilt today. Designed by one of my favorite designers, Lori Smith, this quilt was the perfect size to hang in my new hallway.

I was restricted by the fact I had to use the existing picture hooks, I cannot remove or add any in our rented home.
After attatching the sleeve to the back of the quilt I inserted a flat slat of wood into it.
The row of hooks already on the wall worked well when I sat the slat of wood, inside my sleeve, along the hooks.
The old Singer of course looks lovely sitting in front of the quilt!


Monday, March 5, 2012

Miniature Two

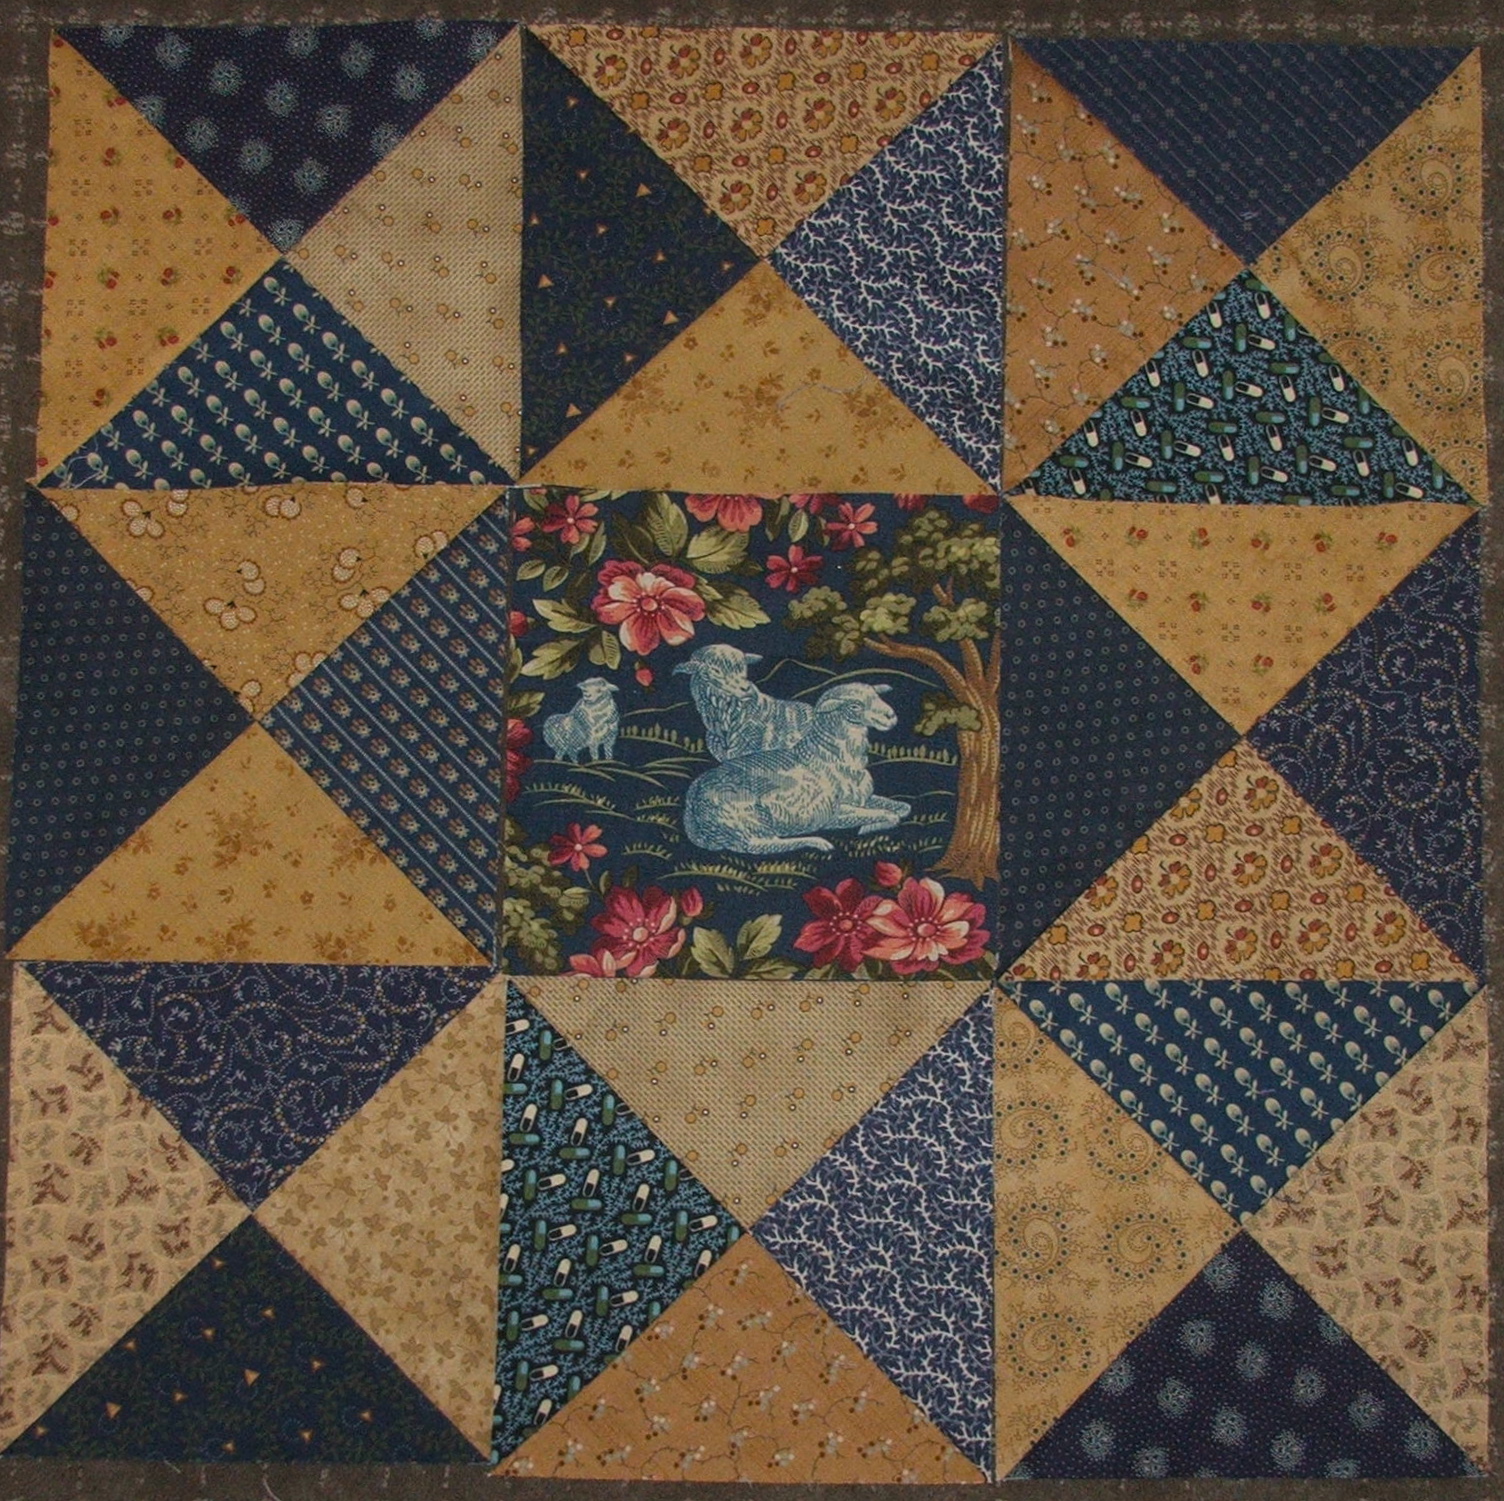
While packing and unpacking I found many UFO's (so many I feel a bit guilty) so I plan on trying to finish a few while my life is a bit less hectic. I took a class last year, which was unusual for me, I am so used to being the one who is running a class. The lovely Kerryn Brand was our teacher and the Mystery quilt she taught used 'Triangle Gems' as its basic building block, interspersed with HourGlass blocks. I finished eight Gem blocks and eight hourglass blocks on the day. 
 Looking at them again I decided I don't really have time to make a lot more blocks to finish the quilt. Instead of laying them out as they are meant to be, I thought, if I just use the 8 finished Gem blocks, put something else in the middle, I will have another miniature for my wall.

I have had the perfect fabric for the centre for so long, just waiting for the right moment to use it!
Do you like the Coventry fabric by Jo Morton with the scene of sheep sitting under a tree?

 Those content looking sheep remind me of probably the best known psalm, number 23:
He makes me lie down in green pastures.
He leads me beside still waters.
He restores my soul...

Here is the finished quilt,  the Gem Blocks surround the picture of content sheep.
I decided to machine quilt the top and managed to finish it in an afternoon then bound it that night.


 Would someone like my leftover hourglass blocks and a picture square with the sheep scene? It's up to you to sew the blocks together!
Be the first to comment on my quilt and the blocks are yours!

Thursday, March 1, 2012

Miniature quilts

I have admired miniature quilts for a while, especially those that are reproduction styled, they remind me of the beautiful little dolls quilts that were made for little girls 150 years ago and are great collectors items now. Check out these little beauties on the Rocky Mountains Quilts site. I love to see these small quilts hung together on a feature wall. Kathy from Inspired by Antique Quilts has a gorgeous wall full of quilts she has made. I love it!
 I am a long way from a wall full of quilts but am happy with my first miniature. Made from fabrics from my brown stash, handquilted and bound with a single thickness binding that Jo Morton uses.